Win2PDF and Win2Image can be configured to set the default file name that is shown in the file save window. It can also be configured to automatically name files and skip the file save window.
To enable the Win2PDF auto-name feature, print to the Win2PDF printer. When the file save window pops-up, choose the auto-name folder location:
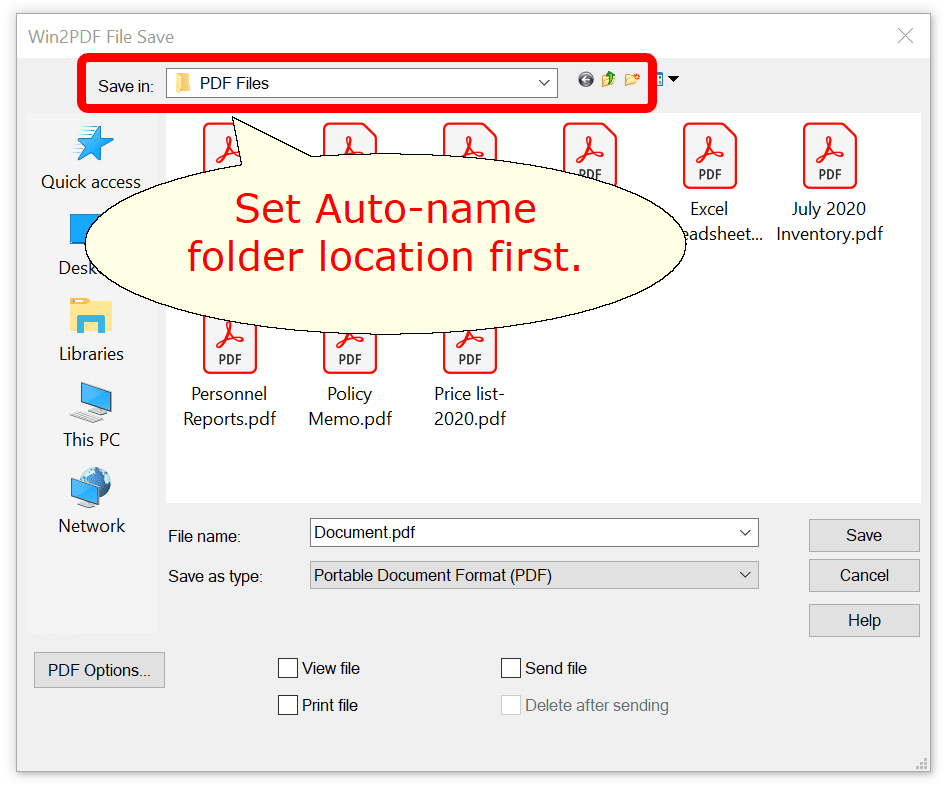
Win2PDF Auto-name set folder location
Next, click on the "PDF Options" button:
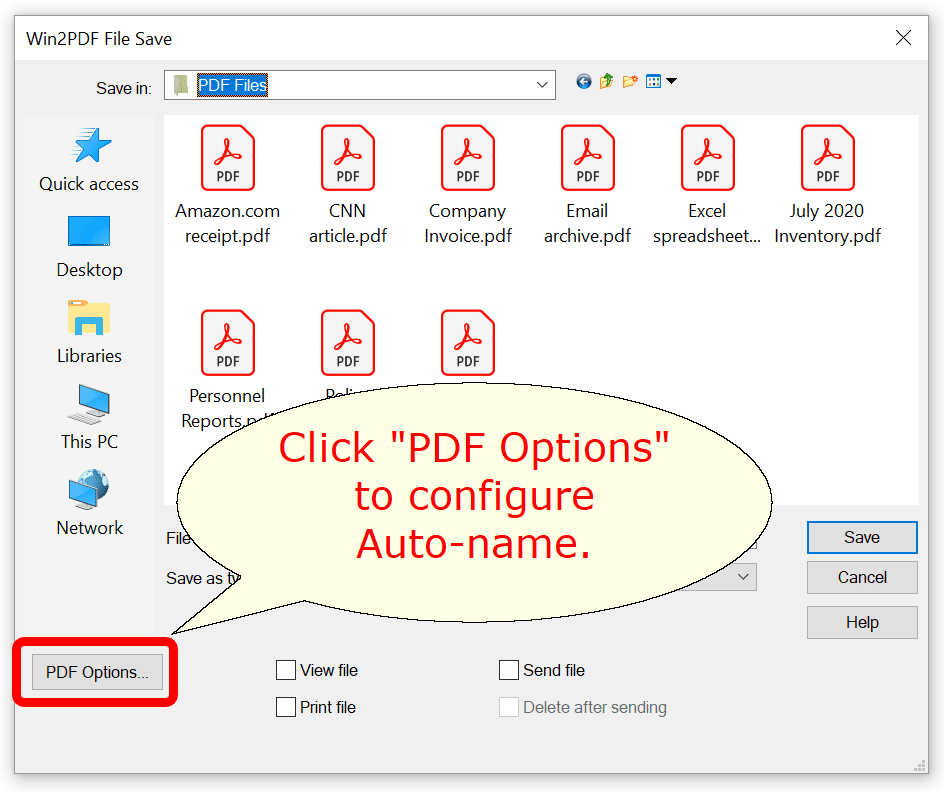
Win2PDF Open PDF Options...
Click the "Document" tab display the Auto-name configuration options.
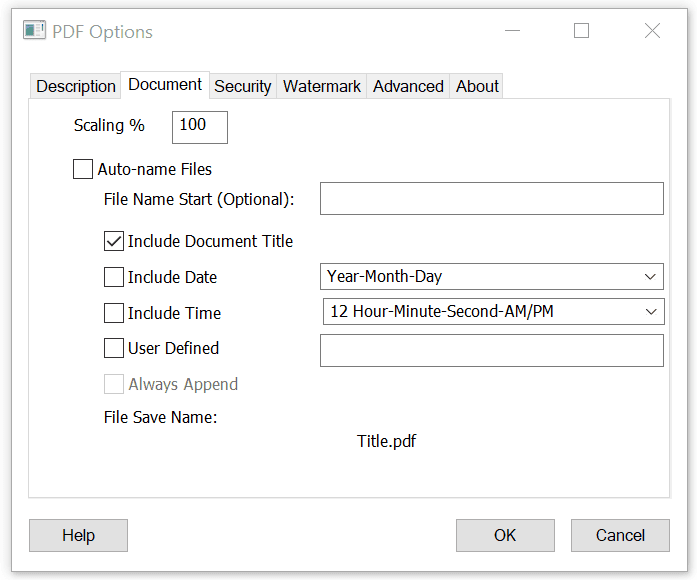
Auto-name Files and Configure File Save Naming
•When the "Auto-name Files" option is unchecked, the settings in this window apply to the name displayed in the Win2PDF File Save window. By default, Win2PDF uses the print document name set by the application as the PDF file name. If you want to customize the default name displayed in the Win2PDF file save window, you can add a fixed file name start, a date stamp, or a time stamp. Advanced users can customize the order of these items using the user defined setting.
•When the "Auto-name Files" option is checked, the settings in this window are used to automatically save the PDF file directly and Win2PDF bypasses the file save window.
The path used by the Auto-name feature is inherited from the currently selected path when you click on the "PDF Options" button in the file save window. To change the auto-name path, go back to the file save window and browse to the desired folder before clicking on the "PDF Options..." button.
The Auto-name feature can also be configured or updated by opening the "Configure Win2PDF Auto-Name" item from the "Win2PDF" group in the Windows Start menu.
The available naming options are:
Auto-name: Include Document Title
Auto-name Files: Content Based File Naming
Auto-name Files: Content Based File Naming: Search Word
Auto-name Files: Content Based File Naming: Content Field
To rename existing files, see How to Auto-Rename PDFs
Enable Win2PDF Auto-name feature
To stop the Auto-name option, run the "Stop Win2PDF Auto-name" program from the Start menu. When you save the options, the following window is displayed:
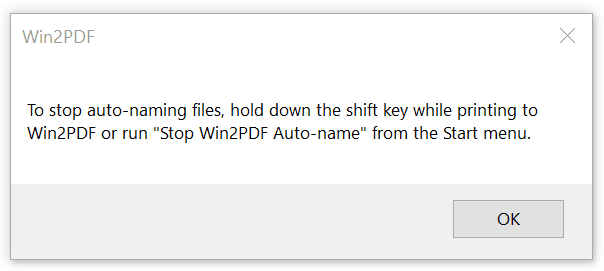
Disable Win2PDF Auto-name
Once Auto-name is enabled, you will no longer see the Win2PDF file save window when you print. To turn off the Auto-name feature and resume prompting for the PDF file save, you will need to go to the Windows Start menu and go to the Win2PDF program group. There, you will be able to select 'Stop Win2PDF Auto-name', as shown below.
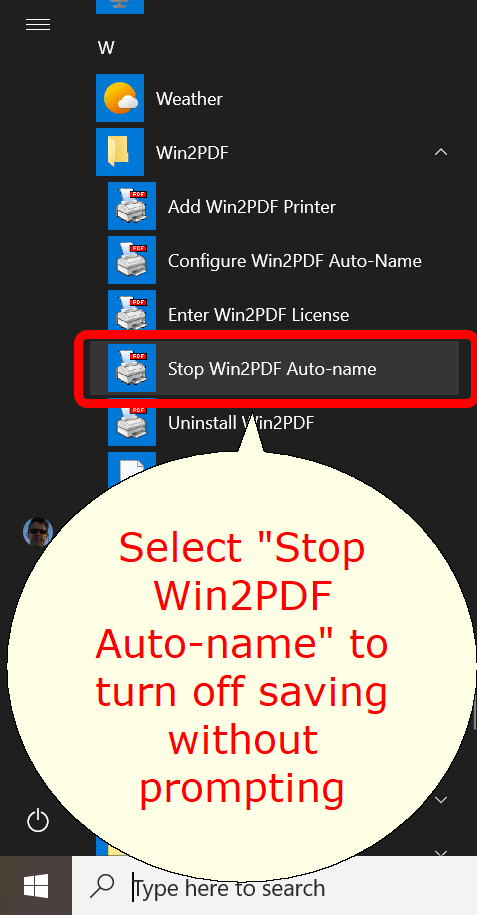
Stop Win2PDF Auto-name from the Windows Start menu
The auto-name settings only apply to the current Win2PDF printer. You can add any number of Win2PDF printers and configure each printer with different auto-name settings.
On multi-user servers, the auto-name settings only apply to the currently logged in user. If you open "Configure Win2PDF Auto-name" using "Run as administrator", the Auto-name settings will apply to all users.
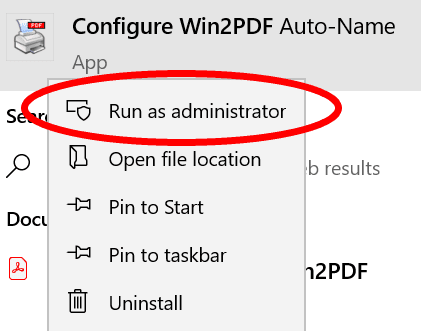
Configure Win2PDF Auto-name for all users
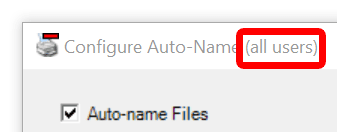
The "Configure Win2PDF Auto-Name" window title should display "All Users":
The auto-name configuration is stopped if you hold down the shift key while printing to the Win2PDF printer. If you are printing to Win2PDF in the background while typing in another program, you may accidentally stop the auto-name if you press the shift key. If you want to prevent this from happening, you can use the Win2PDF Admin Utility "Troubleshooting" option to "Disable Auto-Name Shift Key check".